When a client is choosing photographs, a visible “Proof — not for publication” label can distinguish review copies from final delivery. It communicates the intended use; it does not enforce an agreement, prevent screenshots or guarantee that the watermark cannot be removed. Keep your original photographs and agree on delivery terms separately.
To start with your own photos, open the batch image watermark tool, or try two sample images. Change shared settings and check both previews before exporting.
Decide what this proof set needs to say
Use a short label that fits every image in the selection, such as STUDIO EXAMPLE — CLIENT PROOF. If separate clients need different notices, prepare separate batches. LocalMark shares one text and style across the selection; it does not assign a unique filename, image number or recipient to each picture automatically.
A useful proof should still let someone judge expression, detail and composition. A large repeated mark may be appropriate for an internal selection set, while a lighter tiled label may suit an early layout review. The right setting depends on the actual pictures, rather than a universal opacity percentage.
Build and review the batch
- Open LocalMark and select your PNG, JPG/JPEG or WebP review copies together. Convert unsupported formats with a trusted local tool first.
- Enter the proof label and enable tiling across the image. Adjust spacing, font size, opacity, angle and color. A change updates every preview.
- Compare a bright image, a dark image, a portrait and a landscape. If one setting cannot suit the whole set, split the files into smaller batches with similar composition.
- Download the ZIP, extract it and inspect the actual PNG or JPG files before sharing them with your client.
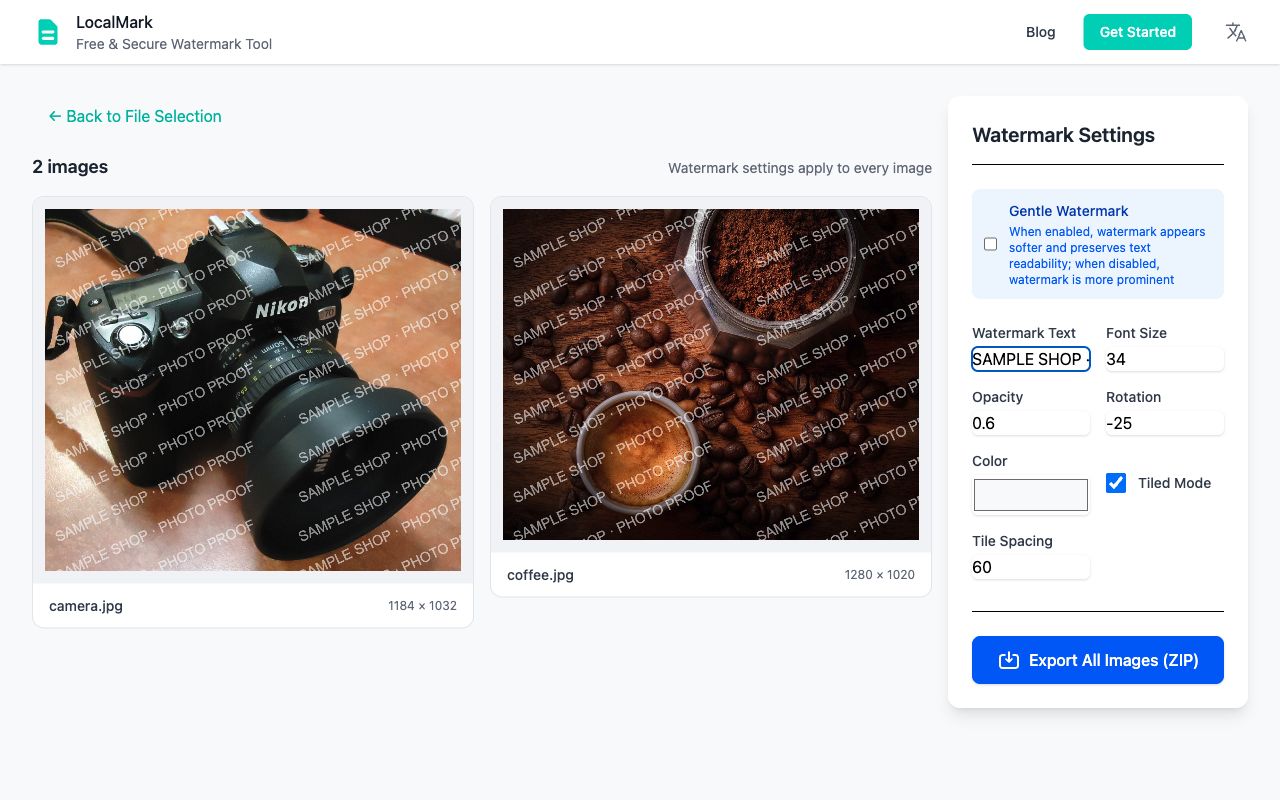
LocalMark provides centered or tiled text; it does not currently let you drag a logo or position text independently on each image. White text can be hard to see in gentle mode. For a light mark on a dark photograph, try normal mode and check the result.
Plan the handoff
Choose PNG or JPG, download a batch as a ZIP, or combine the images into one PDF. Set a maximum long edge or target size when you need smaller review copies. PNG retains transparency; JPG uses a white background.
Processing stays in the browser. Images are not retained after closing the page, so save the result before leaving. Large batches depend on available device memory; divide a high-resolution shoot into smaller groups. After final approval, deliver from the originals rather than trying to remove a proof mark from an exported image.
See the batch image guide for format details, or compare watermark tools if you need logo stamps or individual placement.
Make the selection unambiguous
A wedding gallery, product shoot and portrait session need different review sets. Export only the shortlist for this round and keep meaningful filenames such as portrait-018-v02.jpg. Ask clients to return those identifiers, rather than “the third photo,” which can change after sorting. LocalMark does not add unique photo numbers automatically.
For a numbered discussion, arrange the shortlist in one PDF, with one image per page, and include the version in the filename. For clients selecting individual images, a ZIP preserves separate files. The two-image sheet is useful for a before/after pair or two crop options; it does not produce an arbitrary multi-photo contact sheet.
Share smaller review copies rather than RAW masters, check that faces and focus remain judgeable, and deliver the approved photographs from the original editing workflow. Local processing avoids sending unpublished portraits to another processing service; sending the downloaded proofs still uses your chosen delivery channel. For layouts rather than photography selections, see the design-proof workflow.