A watermark should communicate a source or purpose while leaving text, formulas and charts readable. Start with a lower opacity and adjust against your actual page.
Normal overlay versus gentle mode
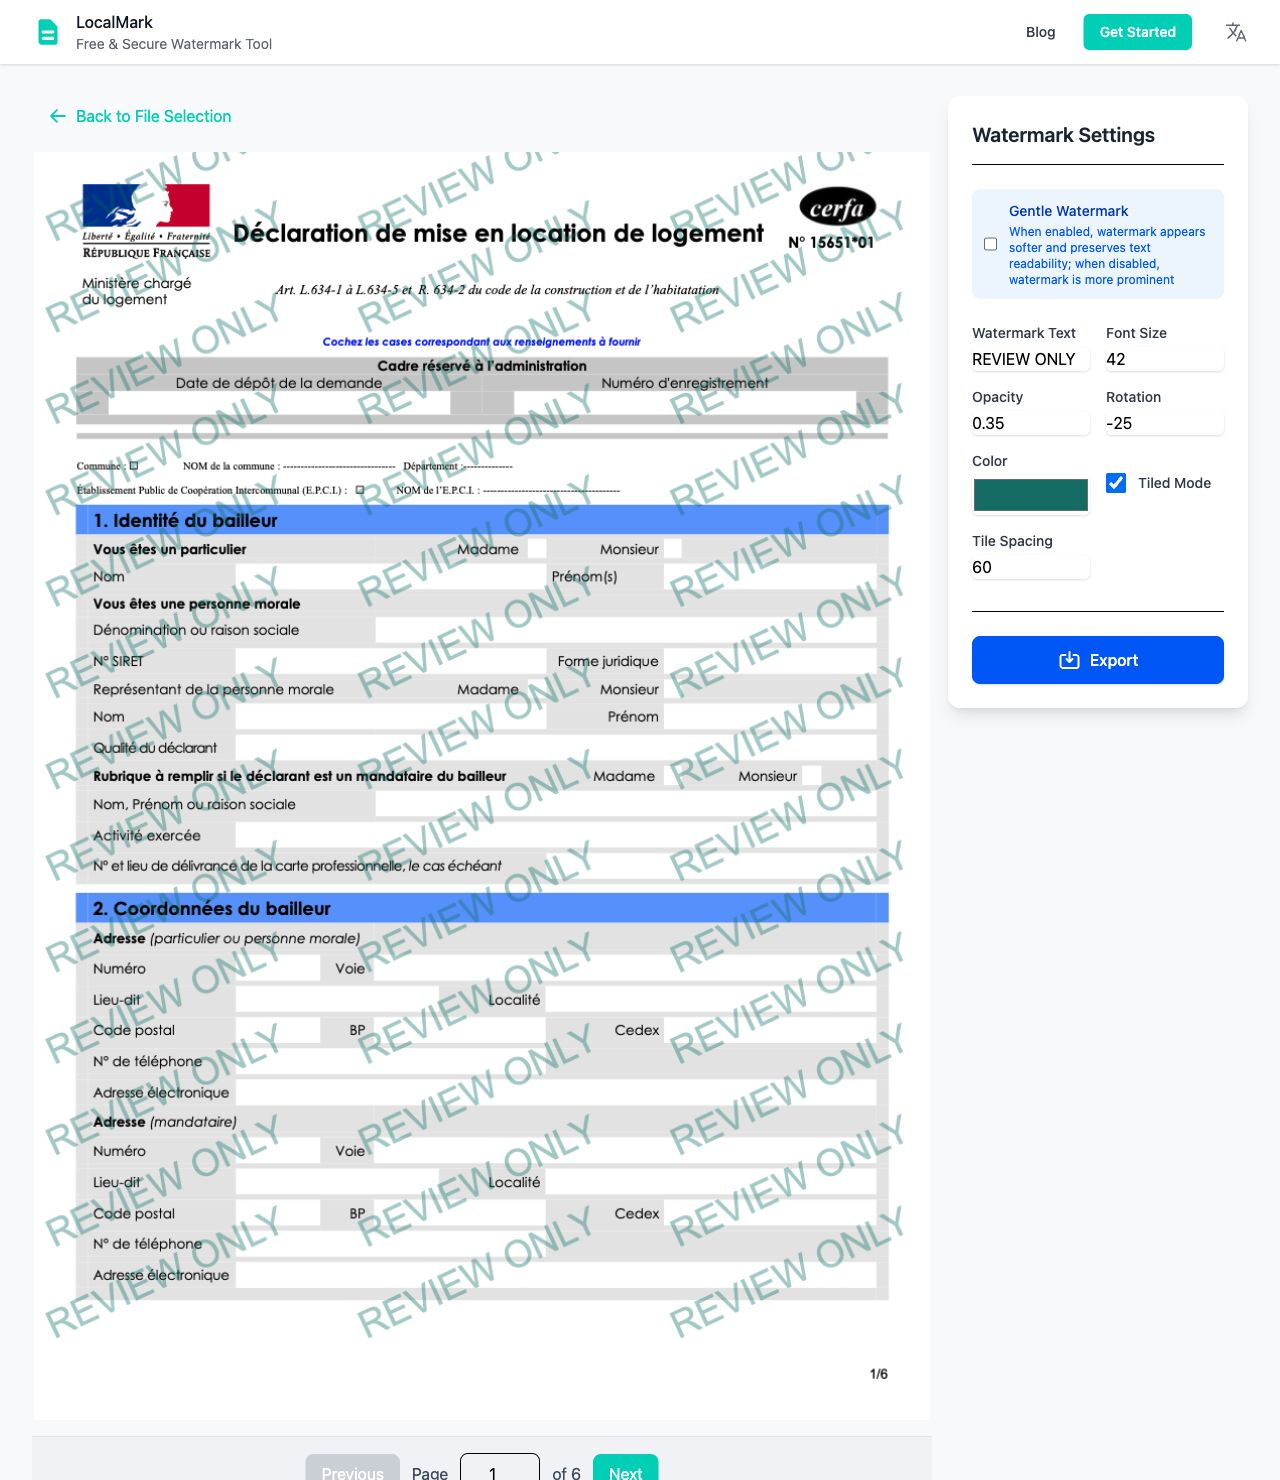
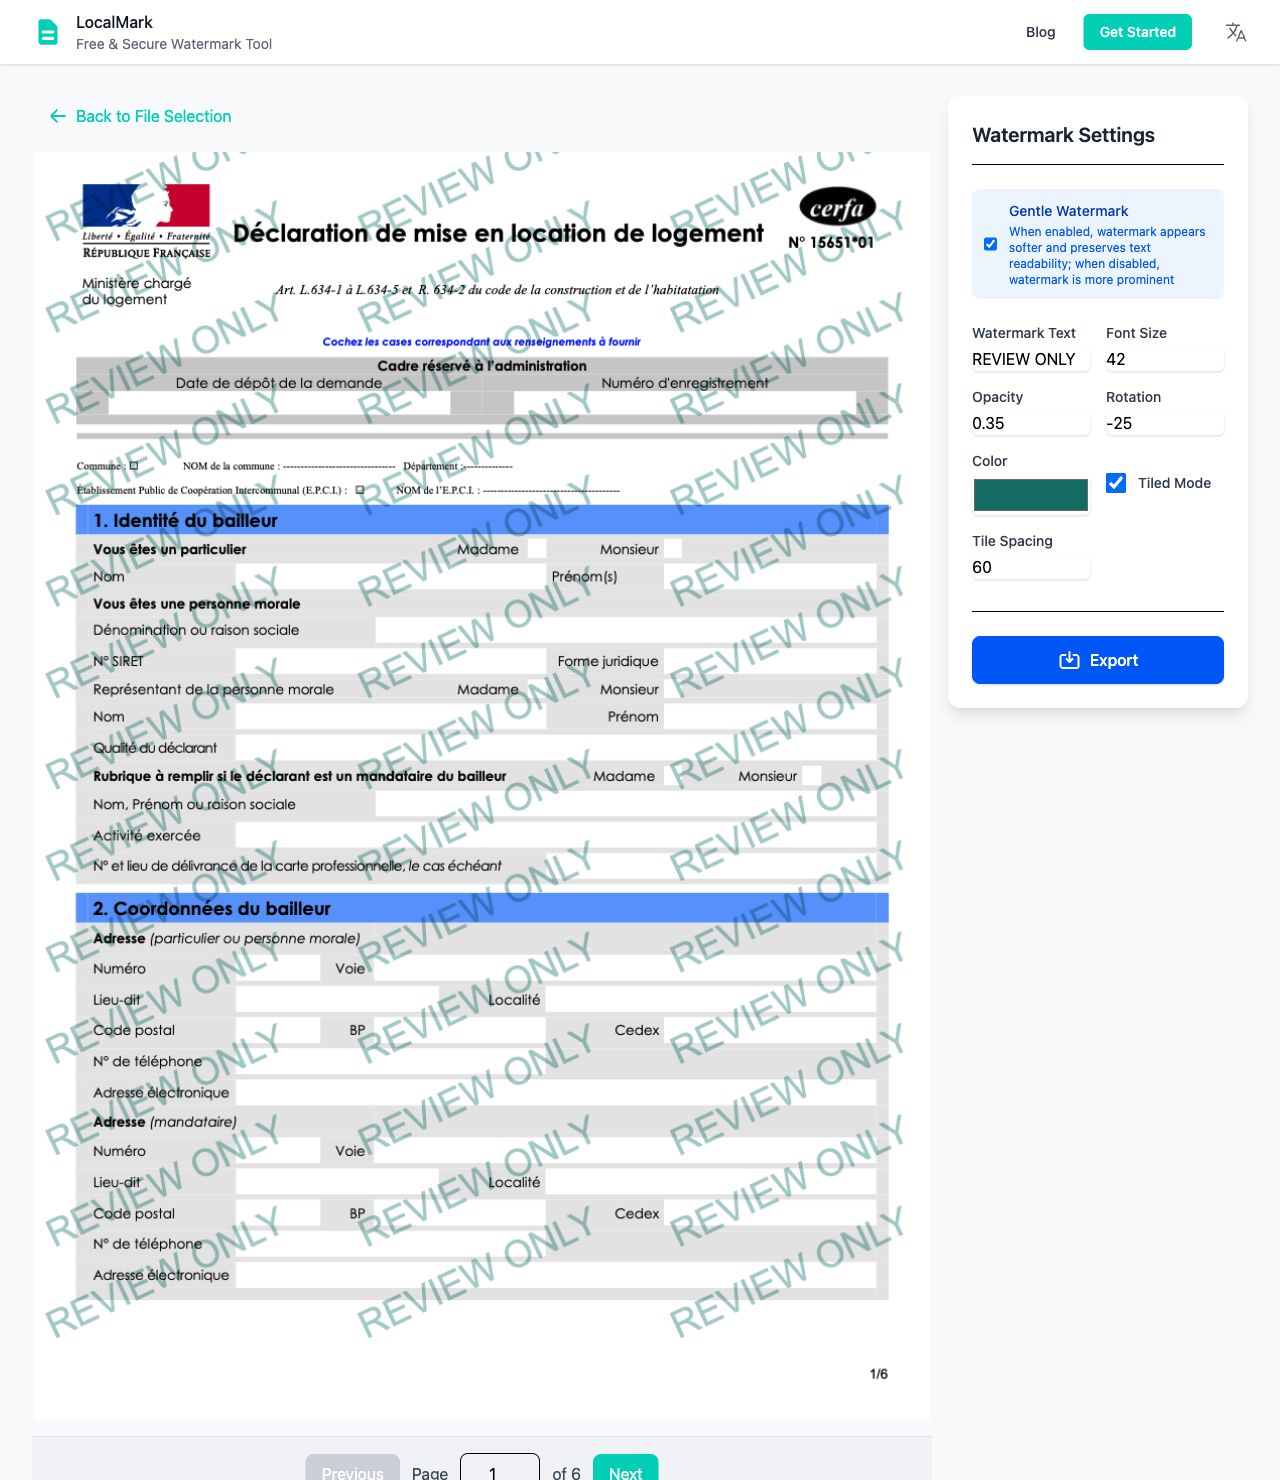
Gentle mode blends the watermark into the page colors to keep the text underneath easier to read. Check small text, numbers and charts with the mode on and off.
On a white background, normal and gentle mode can look similar. Differences are more noticeable where a colored watermark crosses dark text or colored regions. A pure black watermark may also look similar in both modes. Compare your own page rather than assuming that a mode name guarantees readability.
Finding a useful opacity
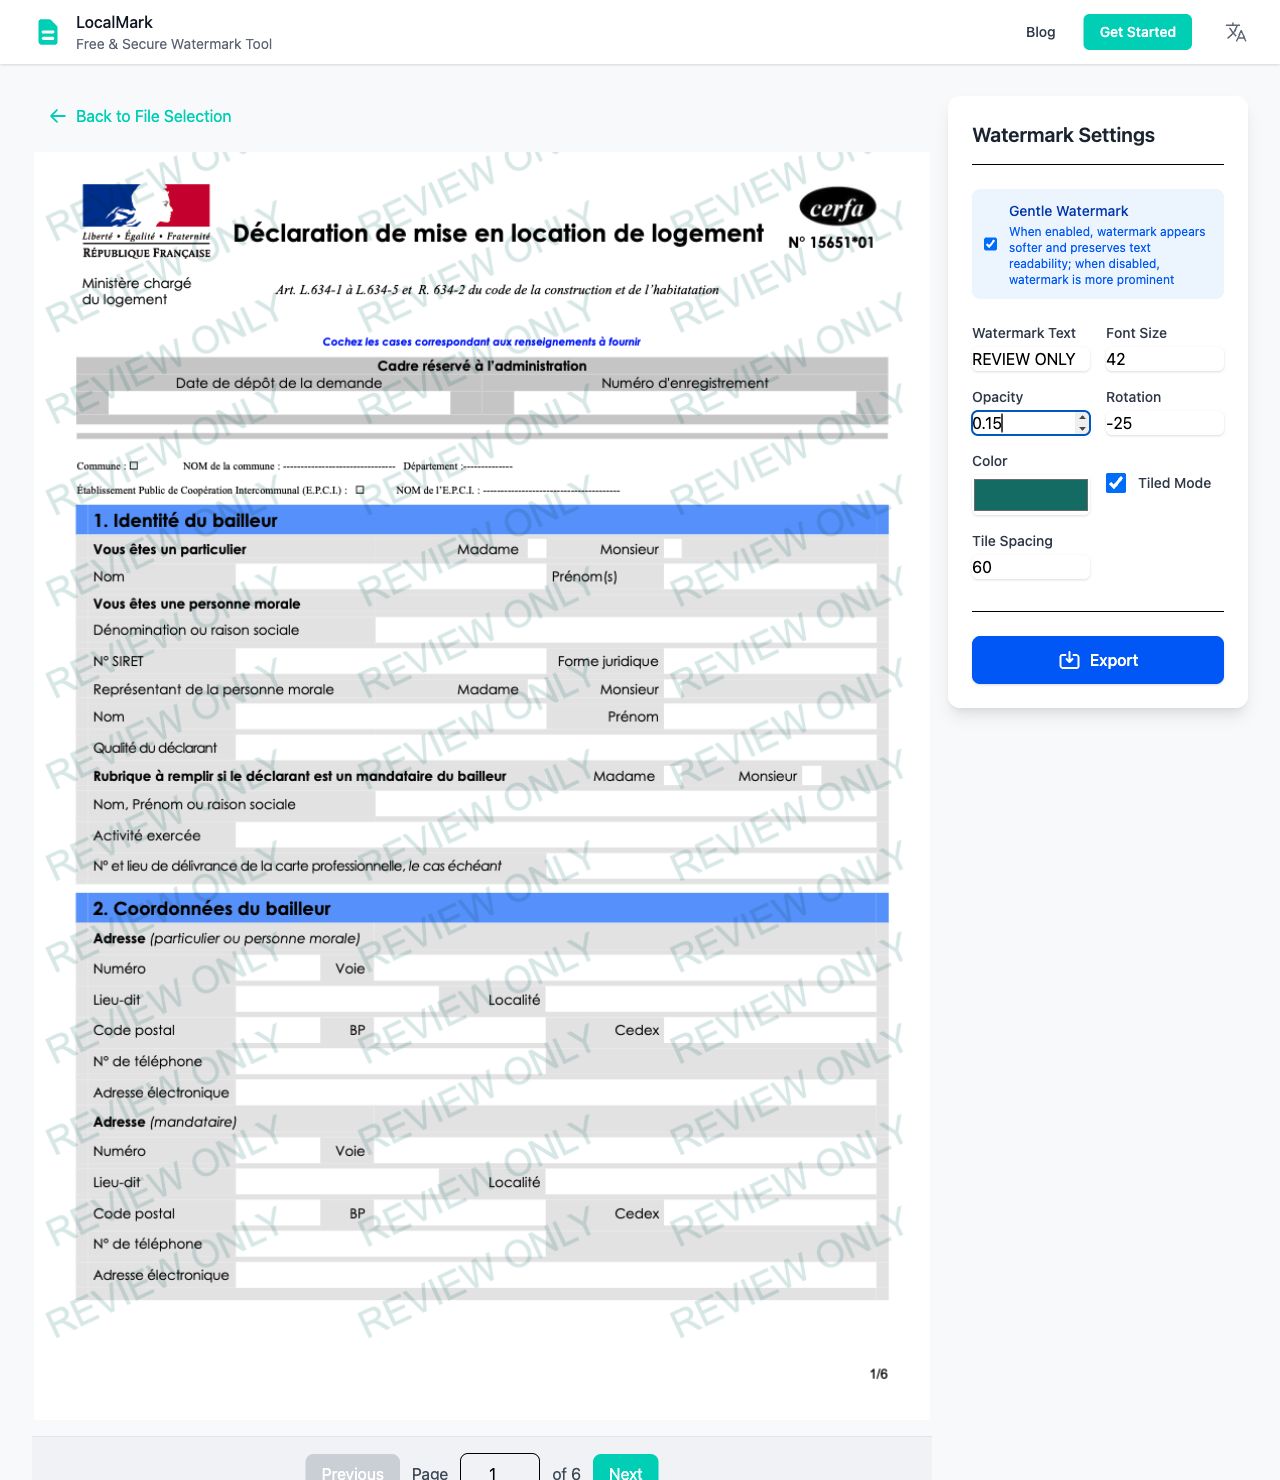
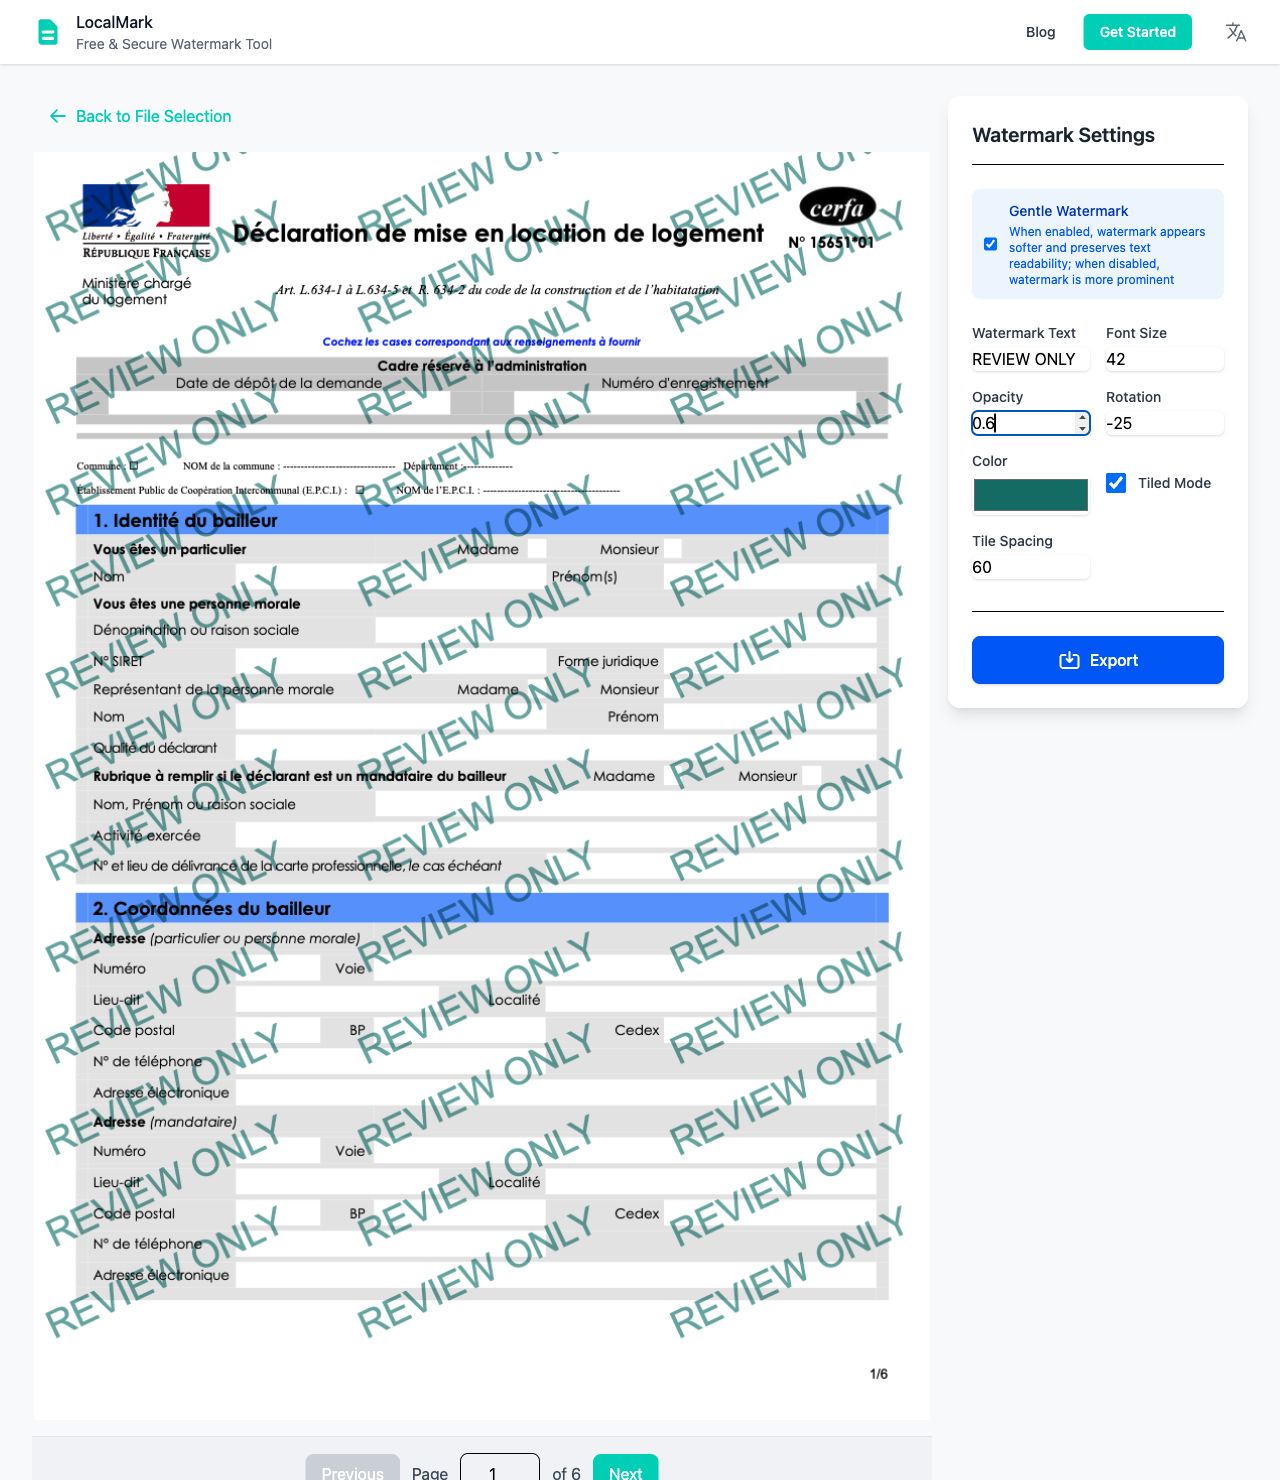
The setting ranges from 0 to 1: 0 is invisible and 1 is fully opaque. Try 0.15–0.25 as a starting point, then adjust for the background, color and size. This is a tuning suggestion, not a universal preset.
If the mark dominates, lower the value or reduce the tiling density. If the text is hard to see, increase it gradually. Changing from pale gray to a darker or branded color also changes the result, even at the same opacity.
Four steps in the tool
- Open the watermark tool, choose one PDF and wait for the preview.
- Enter a usage label such as “Review only” and enable tiling across the page. Toggle gentle mode and compare the same page.
- Keep color, size and angle fixed while adjusting opacity, then change tile spacing. Change one option at a time.
- Check dense text, charts and scanned pages. Reopen the exported file. If you need paper output, print a sample page first.
Check the content instead of applying a fixed preset
| Page content | Inspect | Adjustments to try |
|---|---|---|
| Body text or contract terms | Small text, punctuation and digits | Lower opacity and increase tile spacing |
| Charts, code or formulas | Thin lines, legends and subscripts | Compare blending modes and reduce overlap |
| Scans or dark pages | Contrast between the background and mark | Compare normal overlay and change watermark color |
White marks may become almost invisible with gentle mode. For a light mark on a dark page, try switching gentle mode off. Screen and print results can differ; check the final medium.
Before you export
LocalMark processes PDF contents in your browser without uploading them. Original files are not saved by default. A recent PDF is stored in this browser only if you opt in, and can be deleted.
Current PDF export turns each page into an image. Selectable text, links and editing features may not survive, so keep your original. Test a copy if continued editing or interactive content matters.
See the PDF watermark guide for the complete workflow and format details.